How to create a blog?
In my previous post, I have mentioned what kind of motivations I have to create a blog. Please check it out, if you are interested. I would like to list the tools I have chosen to create the blog:
- GitHub Pages
- Jekyll
- GoDaddy
If you find any errors in the post, please do not hesitate to write to me.
Creating GitHub Page
Previously I was using GitHub for my projects, after the acquisition, I started to use GitLab. But for the blog, I will go with Github. The only thing you should do for your blog or page is to create a project with the name <username>.github.io. In my case, I should create a project with the name mustafagonul.github.io. But in the images you will see nimusoft instead of mustafagonul, the reason is I have already created a GitHub Page for mustafagonul and I needed a fresh one for taking snapshots for the post because I don’t want to delete the current one, so I have created an organization and named it nimusoft. If you would like to have further information, please also check the official guide and help.
-
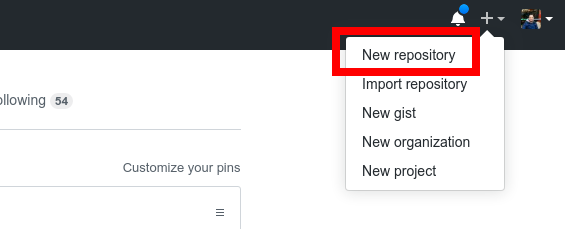
Please click the plus button and then New repository.
-
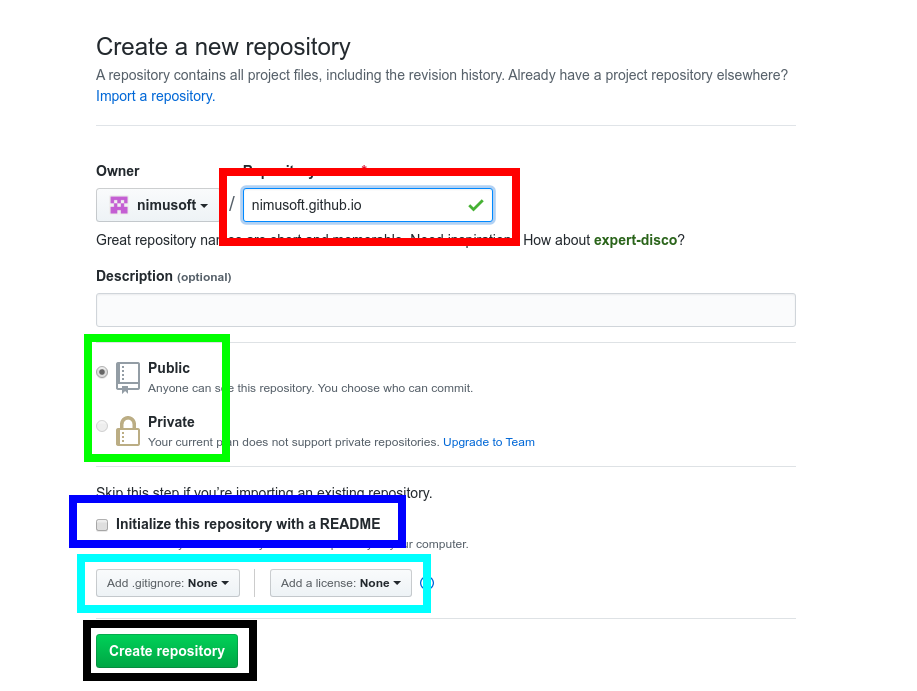
Enter your repository name, in this case, your repository name should be <username>.github.io. Optionally we are selecting project privacy type (You can make it Public or Private, just be aware of your GitHub plan.) .gitignore file type (I choose Jekyll.) license type and choose if you want to initialize a README.md file. For my GitHub pages, I don’t create README.md files, instead of this, I prefer to use index.md. In your case, you can stick to creating README.md files. As a final resort, you click the Create repository button.
-
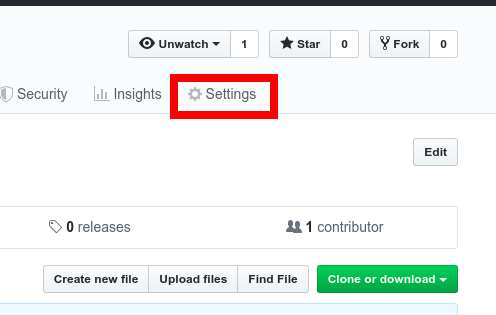
You created your repository. To activate the GitHub Pages, we need to go to the settings on the repository page. Please click Settings.
-
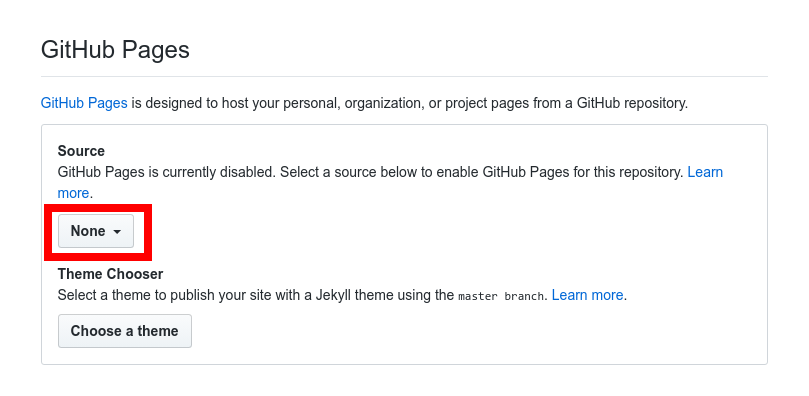
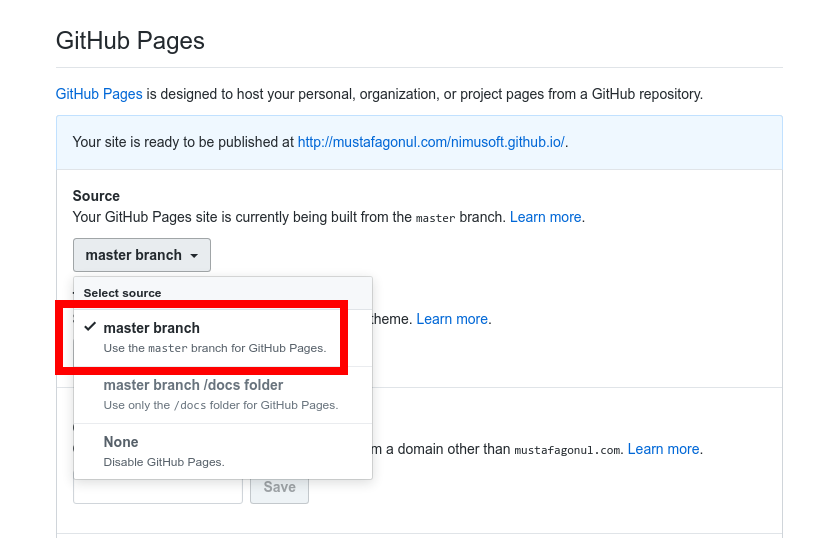
On this page, you configure the branch and the theme. Please click None. GitHub Pages may be enabled by default, and you may see that option is set to the master branch. Please leave like that.
-
We are selecting the first option, master branch. The second option, master branch /doc folder can be chosen if you want to create a site within a project. That seems odd, this choice can be used if you want to go with the mono-repo for your project. Later if you want to disable GitHub pages, please come here and select None. I have seen in some projects, people create a separate branch named gh-pages for this kind of stuff and select this branch here, especially if you want to maintain the code and the pages in the same repository and please select the branch here.
-
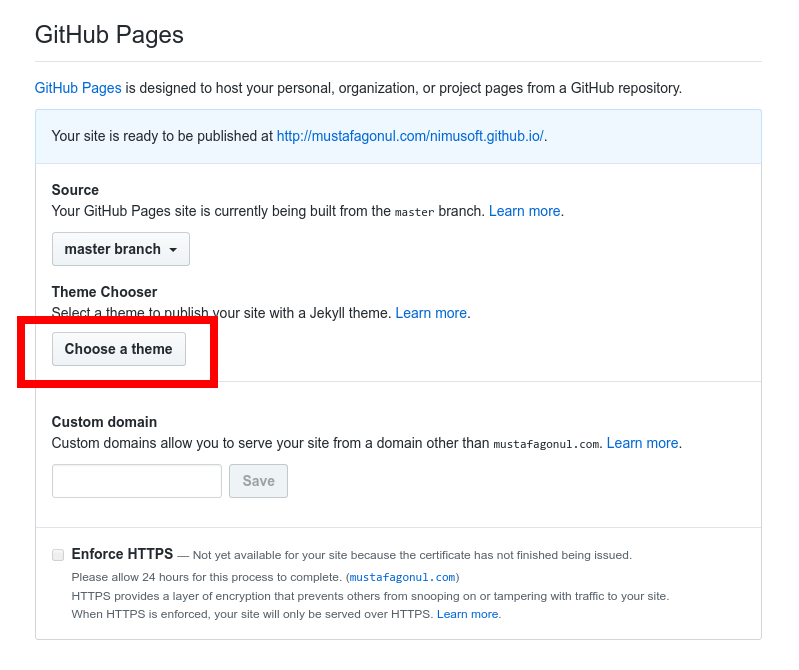
For now, we are selecting the theme for our site. But I would like to point out that it is not necessary. You can also select the theme in _config.yml manually. Let’s select the theme here.
-
I prefer to use the hacker theme, because I find it awesome 😄, isn’t it?
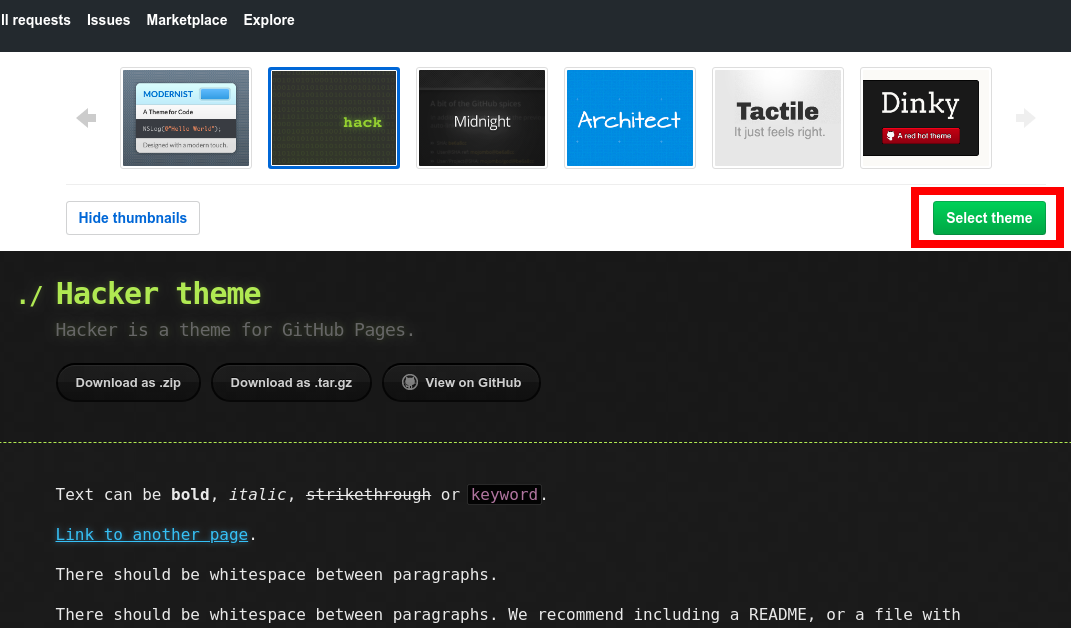
After selecting the theme,
_config.ymlis created. If you check out the configuration file, you will see something like below:theme: jekyll-theme-hackerIf you want to select another theme, this is the place you can write to.
-
After selecting the theme, you will get a page like below. On this page you can fill the main page. By default, README.md file is created. I prefer to create index.md files instead of README.md files.
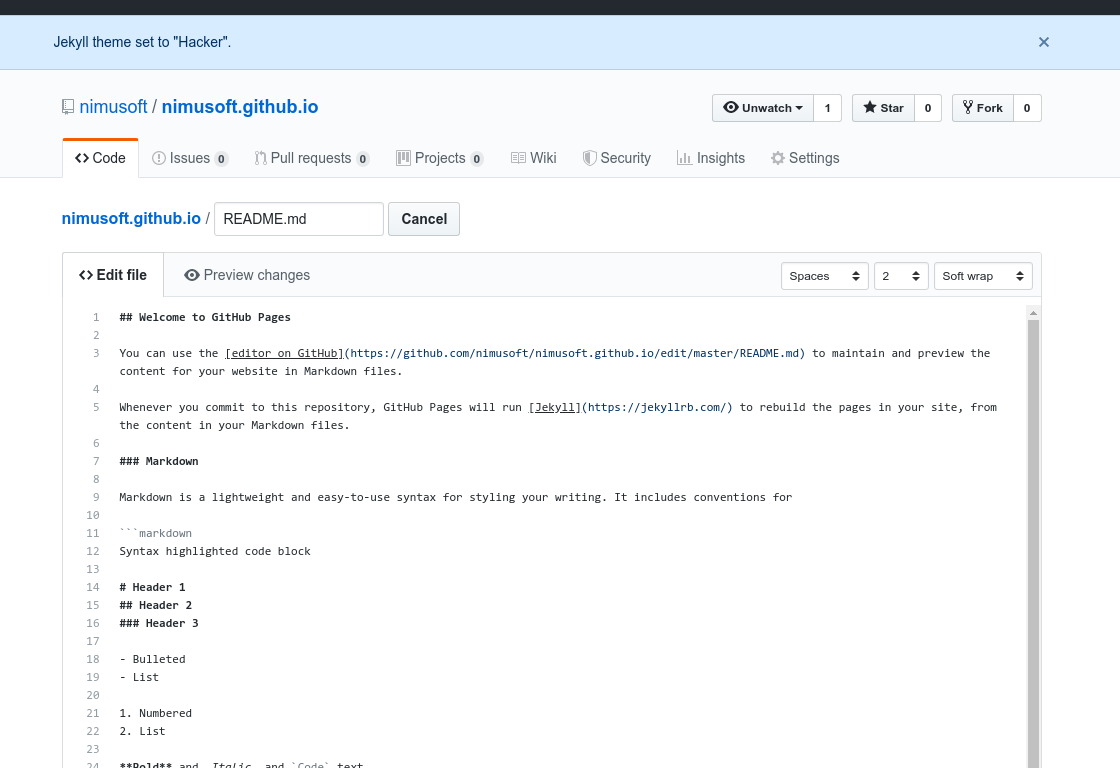
After selecting the theme, perhaps you may not be directed to this page. I experience this from time to time. If you aren’t directed to this page and cannot find an opportunity to create the file. Please create it manually if it is not created.
Using Jekyll
I think, creating your site with editing the files in GitHub is not so efficient. You can also skip this section if you aren’t planning to do on your local, but in the free plan AFAIK there is a limitation for it. You can update and commit as much as possible, but on a daily basis you have 10 builds. There are other limitations also, besides these, I find easy to write a post on local.
-
Btw I use Arch. Here is some good documentation on how to install Jekyll to Arch Linux. I think already Arch users are pretty familiar with that. Other distro users can follow the instructions on the Jekyll official website.
If I should come how I install Jekyll, I use pacaur for AUR packages and I installed Jekyll with the command:
$ pacaur -S jekyll -
As you guess, we are cloning the project, we have mentioned in the previous section. I assume you have a repository named
https://github.com/<username>/<username>.github.io. For my case, I do the following:$ git clone git@github.com:mustafagonul/mustafagonul.github.io.git -
Now we are creating a new Jekyll project on this repository. Assume that we haven’t cloned any project and we would like to create a new, empty Jekyll project. How will we do this? Assume we want to create an empty project named foo. We should execute the following command:
$ jekyll new fooIf we execute a command like that for our repository, it will complain because there are some existing files. Because of that, we are executing the following command in the parent directory of our project with –force parameter:
$ jekyll new mustafagonul.github.io --forceThe command will override the current files in the project and several files will be generated. Now you should organize the repository according to your demands. I can give my list to you:
- I remove Gemfile and Gemfile.lock
- I rename README.md files with index.md
- I configure _config.yml file according to my needs
-
As a final resort, we would like to serve the site with Jekyll. All the overwriting thing we have done is to serve the site locally. To serve the site, you should execute the following command in the repository:
jekyll serve
There are also some possibilities and some other options in the Jekyll and Ruby, currently, I am skipping these kinds of information to keep it simple for a beginner especially like me. 😄
Managing the domain with GoDaddy
If you want to go with the GitHub domain, you can skip this section and think that your first mission is accomplished. In most cases, you want your private domain like me. I had my domain for many years, but could not find any time to touch it. I had tried to create for myself with Wt because I didn’t know any language except C / C++ these days. (I had known PHP, but I did not want to program with it.) Now I am not ignorant as I was before 😄, I am pretty confident to use other languages and tools. But if some people interested in Wt, I can also transfer my knowledge via my blog posts.
To forward your domain to GitHub, two things you should configure. Your domain, which is in GoDaddy and GitHub repository. Naturally, you can go with other service providers. Steps are pretty the same, you can improvise.
-
Create and account and reserve a domain. I wish, you are lucky enough to find a domain name which you are happy with.
-
Secondly you should go to the DNS settings. To do that please click DNS Button.

-
After clicking the DNS button, you are directed to a page that includes your DNS records. You should edit them as the following. Please don’t write my GitHub Page link 😄, use your own:

Most of the people make a mistake like not deleting the remaining DNS records on the page. GoDaddy adds some records by default and you should remove from the list. Please do not forget to do that.
-
Configuring your domain is finished, time to configure GitHub Repository. I assume you know how to go to the GitHub Pages settings of your repository. Previously we set the branch and theme. Let’s go there:
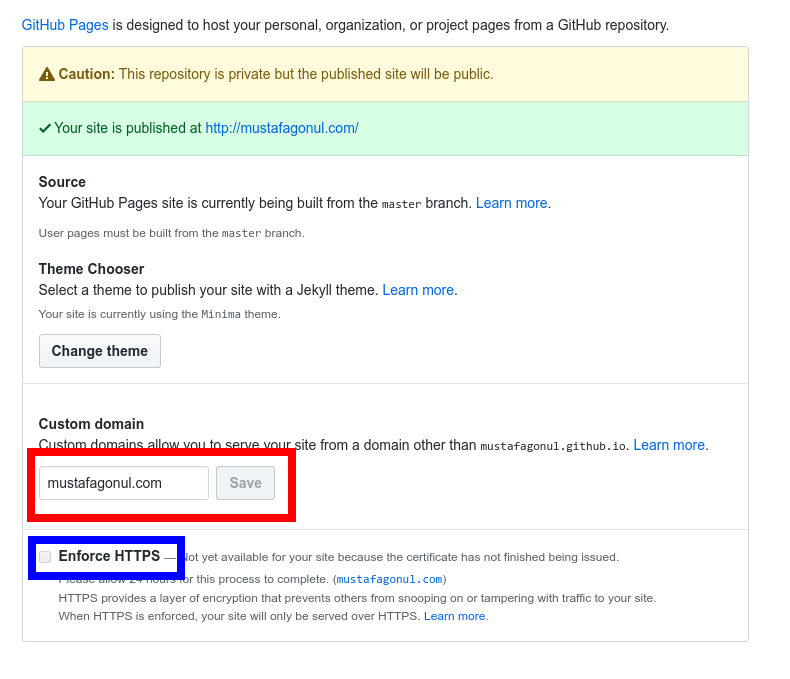
Here you can enter your domain and save it. The save operation creates a file in your repository named CNAME. In this file, only your domain name is written. Of course, you can also manually do this step.
The other thing you should do is enforcing HTTPS connection for your site. You should click the checkbox, but don’t be afraid, it takes some time to be activated. In the end, you will see something like below:

-
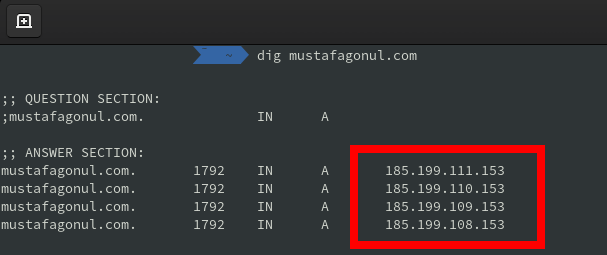
I also advise you to check if your DNS records are correct. You can use nslookup or dig command to check it up. In the end, you should see something like below:
I have also listed below which references I have used. I advise you also to check the references for further information.
References
- Creating a GitHub Pages site
- Managing a custom domain for your GitHub Pages site
- Troubleshooting custom domains and GitHub Pages
- About custom domains and GitHub Pages
- Arch Linux - Jekyll
- Jekyll Official Documentation
- Jekyll Official Tutorials
- Liquid Documentation
- DNS records: A beginner’s guide
- Create Type A Record for GoDaddy
- Add an A record
- How DNS Works – the Domain Name System (Part One)
- How to Set up GoDaddy Domain with GitHub Pages